Mott’s Children’s Hospital has made it so easy to send a Valentine to a patient! I just did it and it literally only took me about 2 seconds. Please take a second and send one if your own.
Author: tinyhandsbigideas
I believe in the exceptional child. I have a BS in Behavioral Psychology and a MA in Special Education. I have been in the education field for about 7 years. I have been a paraprofessional, a preschool teacher, and I am currently a special education teacher. I have worked with a variety of different students from preschool to 6th grade. All of these students have had different behavioral and educational needs.

Valentine Heart Doors
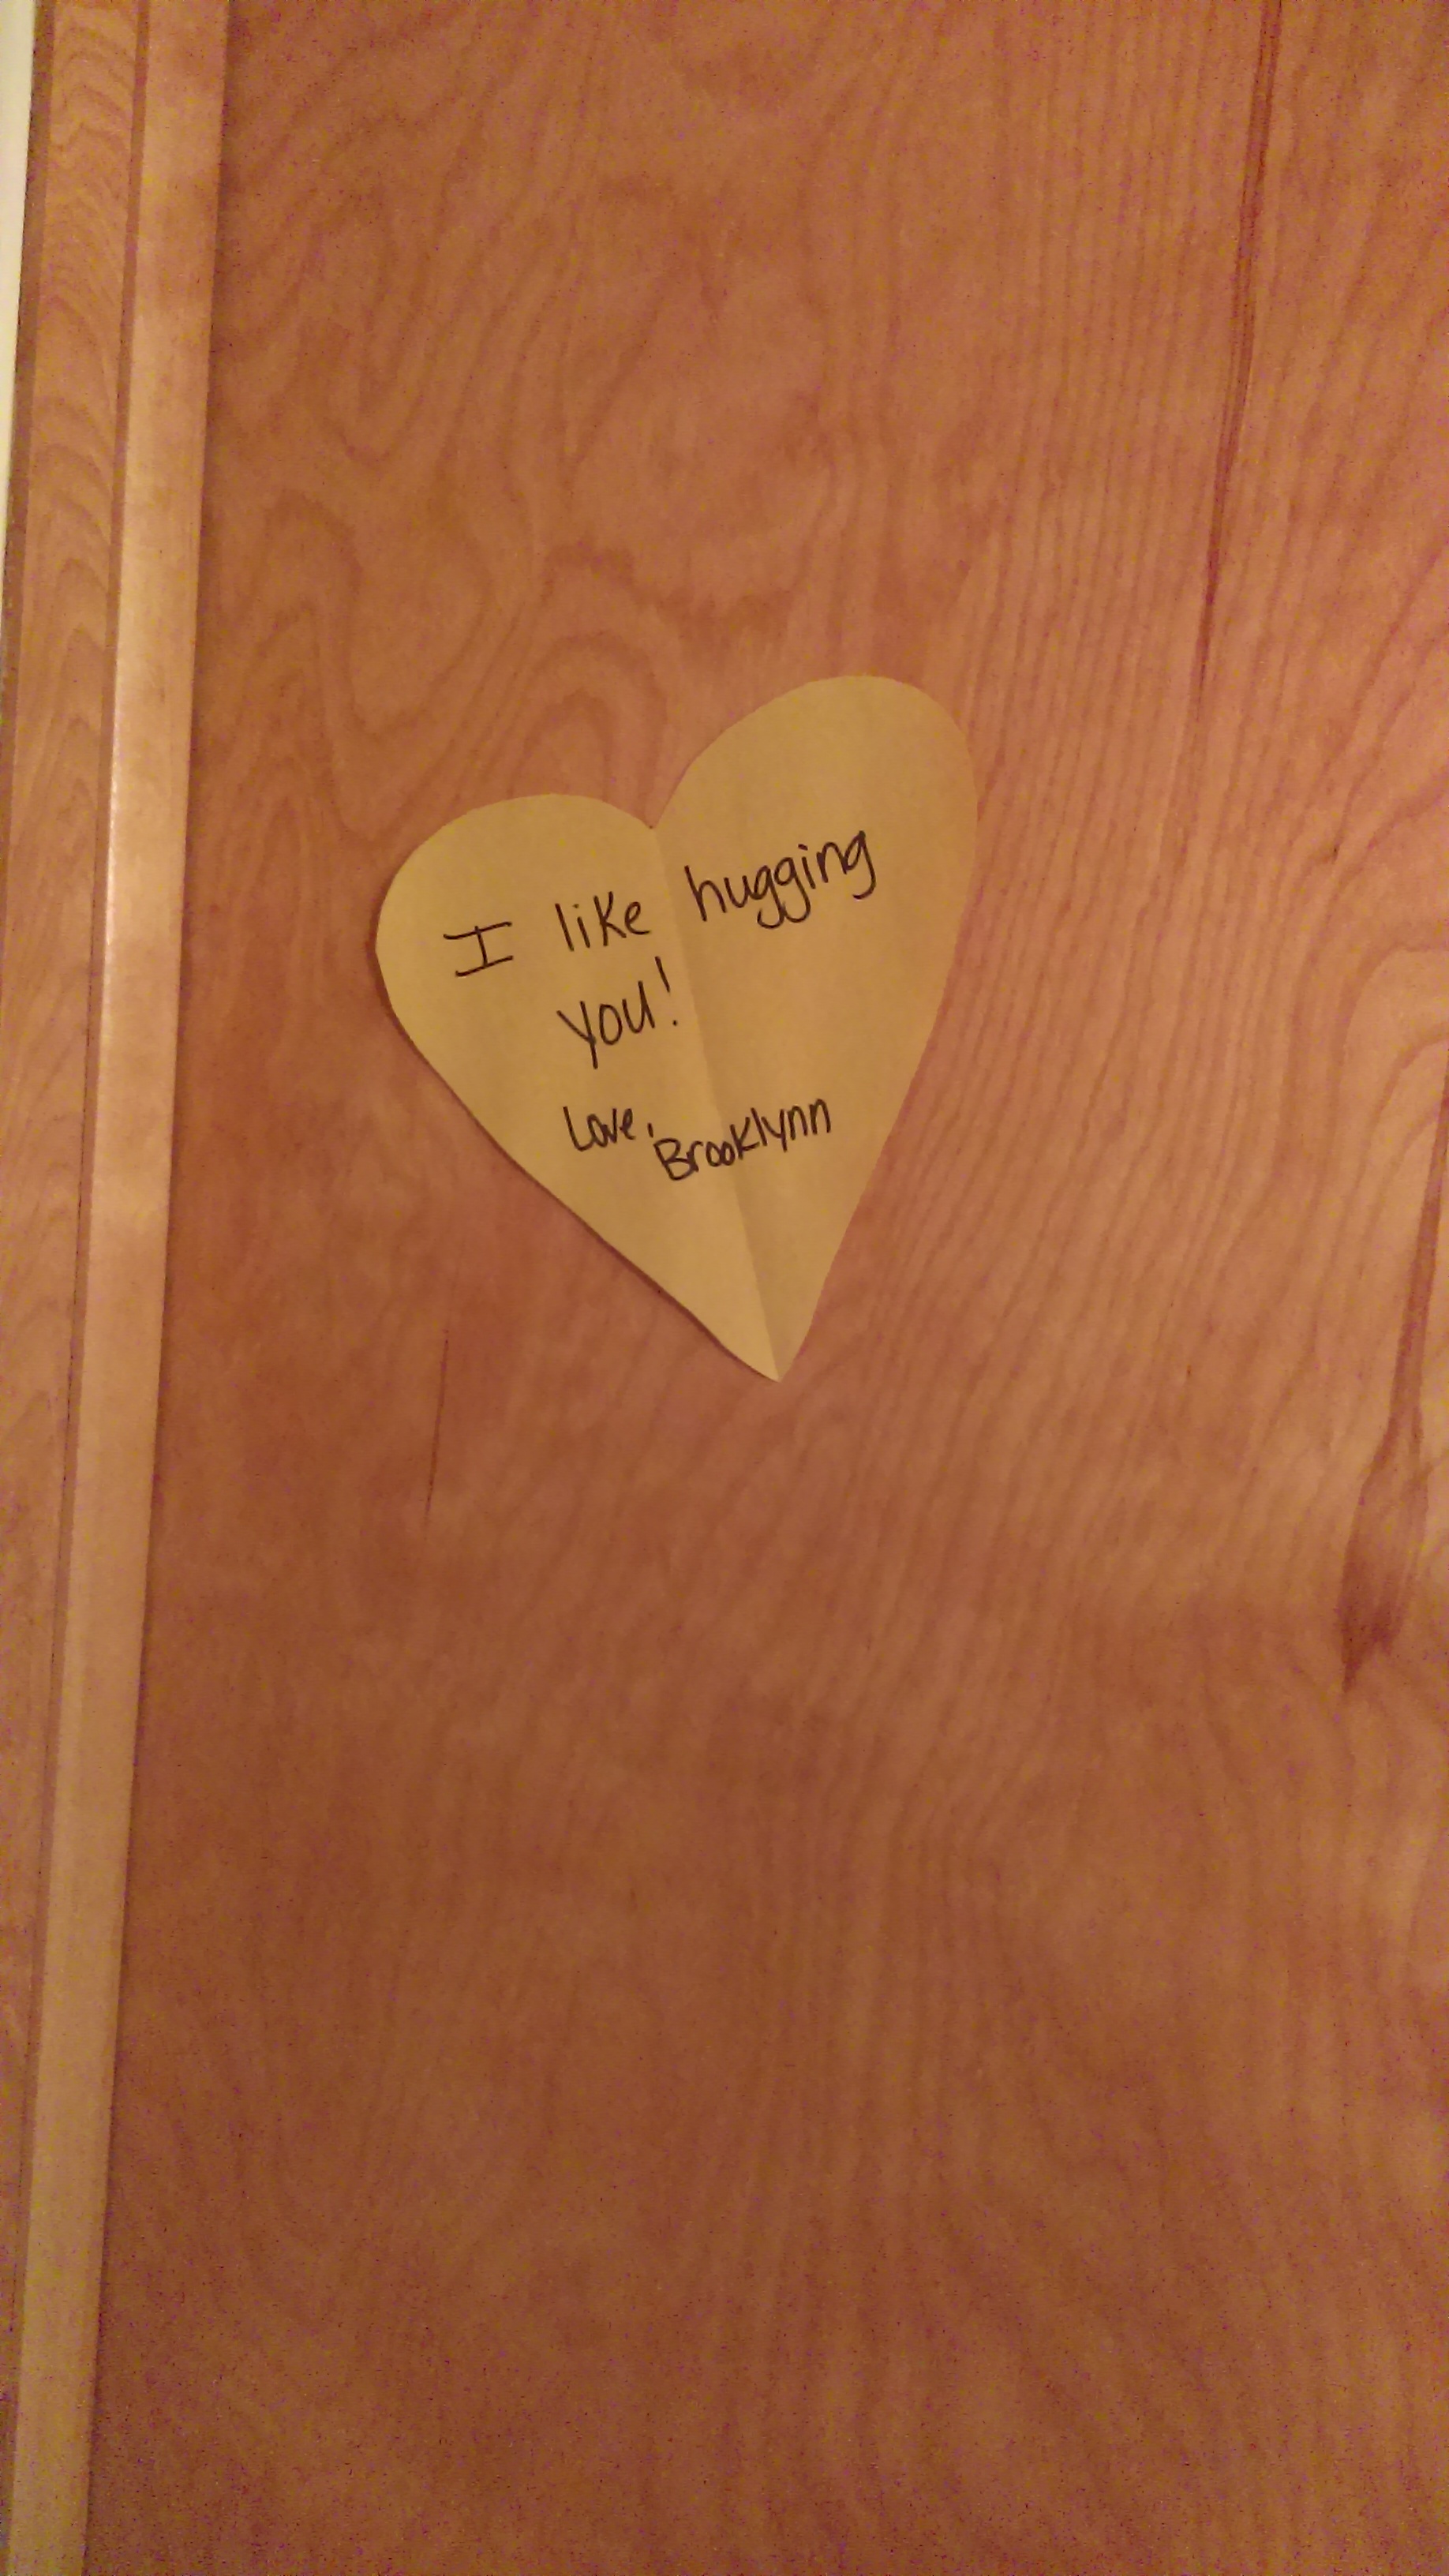
So we started decorating our doors for Valentine’s Day!! This awesome idea came from Skip to my Lou. We decided to not only decorate our kiddos doors. Babes and Baby H are putting hearts on our doors too.

This is a great way to help your kids learn about giving meaningful compliments. Each night after family dinner we cut out hearts. Babs is able to work on her cutting skills too! Each person writes something they love about each family member on a heart for their door. Babs tells me hers and write it, and of course Baby H needs a lot of help too. Babs loves writing things about her Baby brother a seeing what “he writes” about her. Lol.
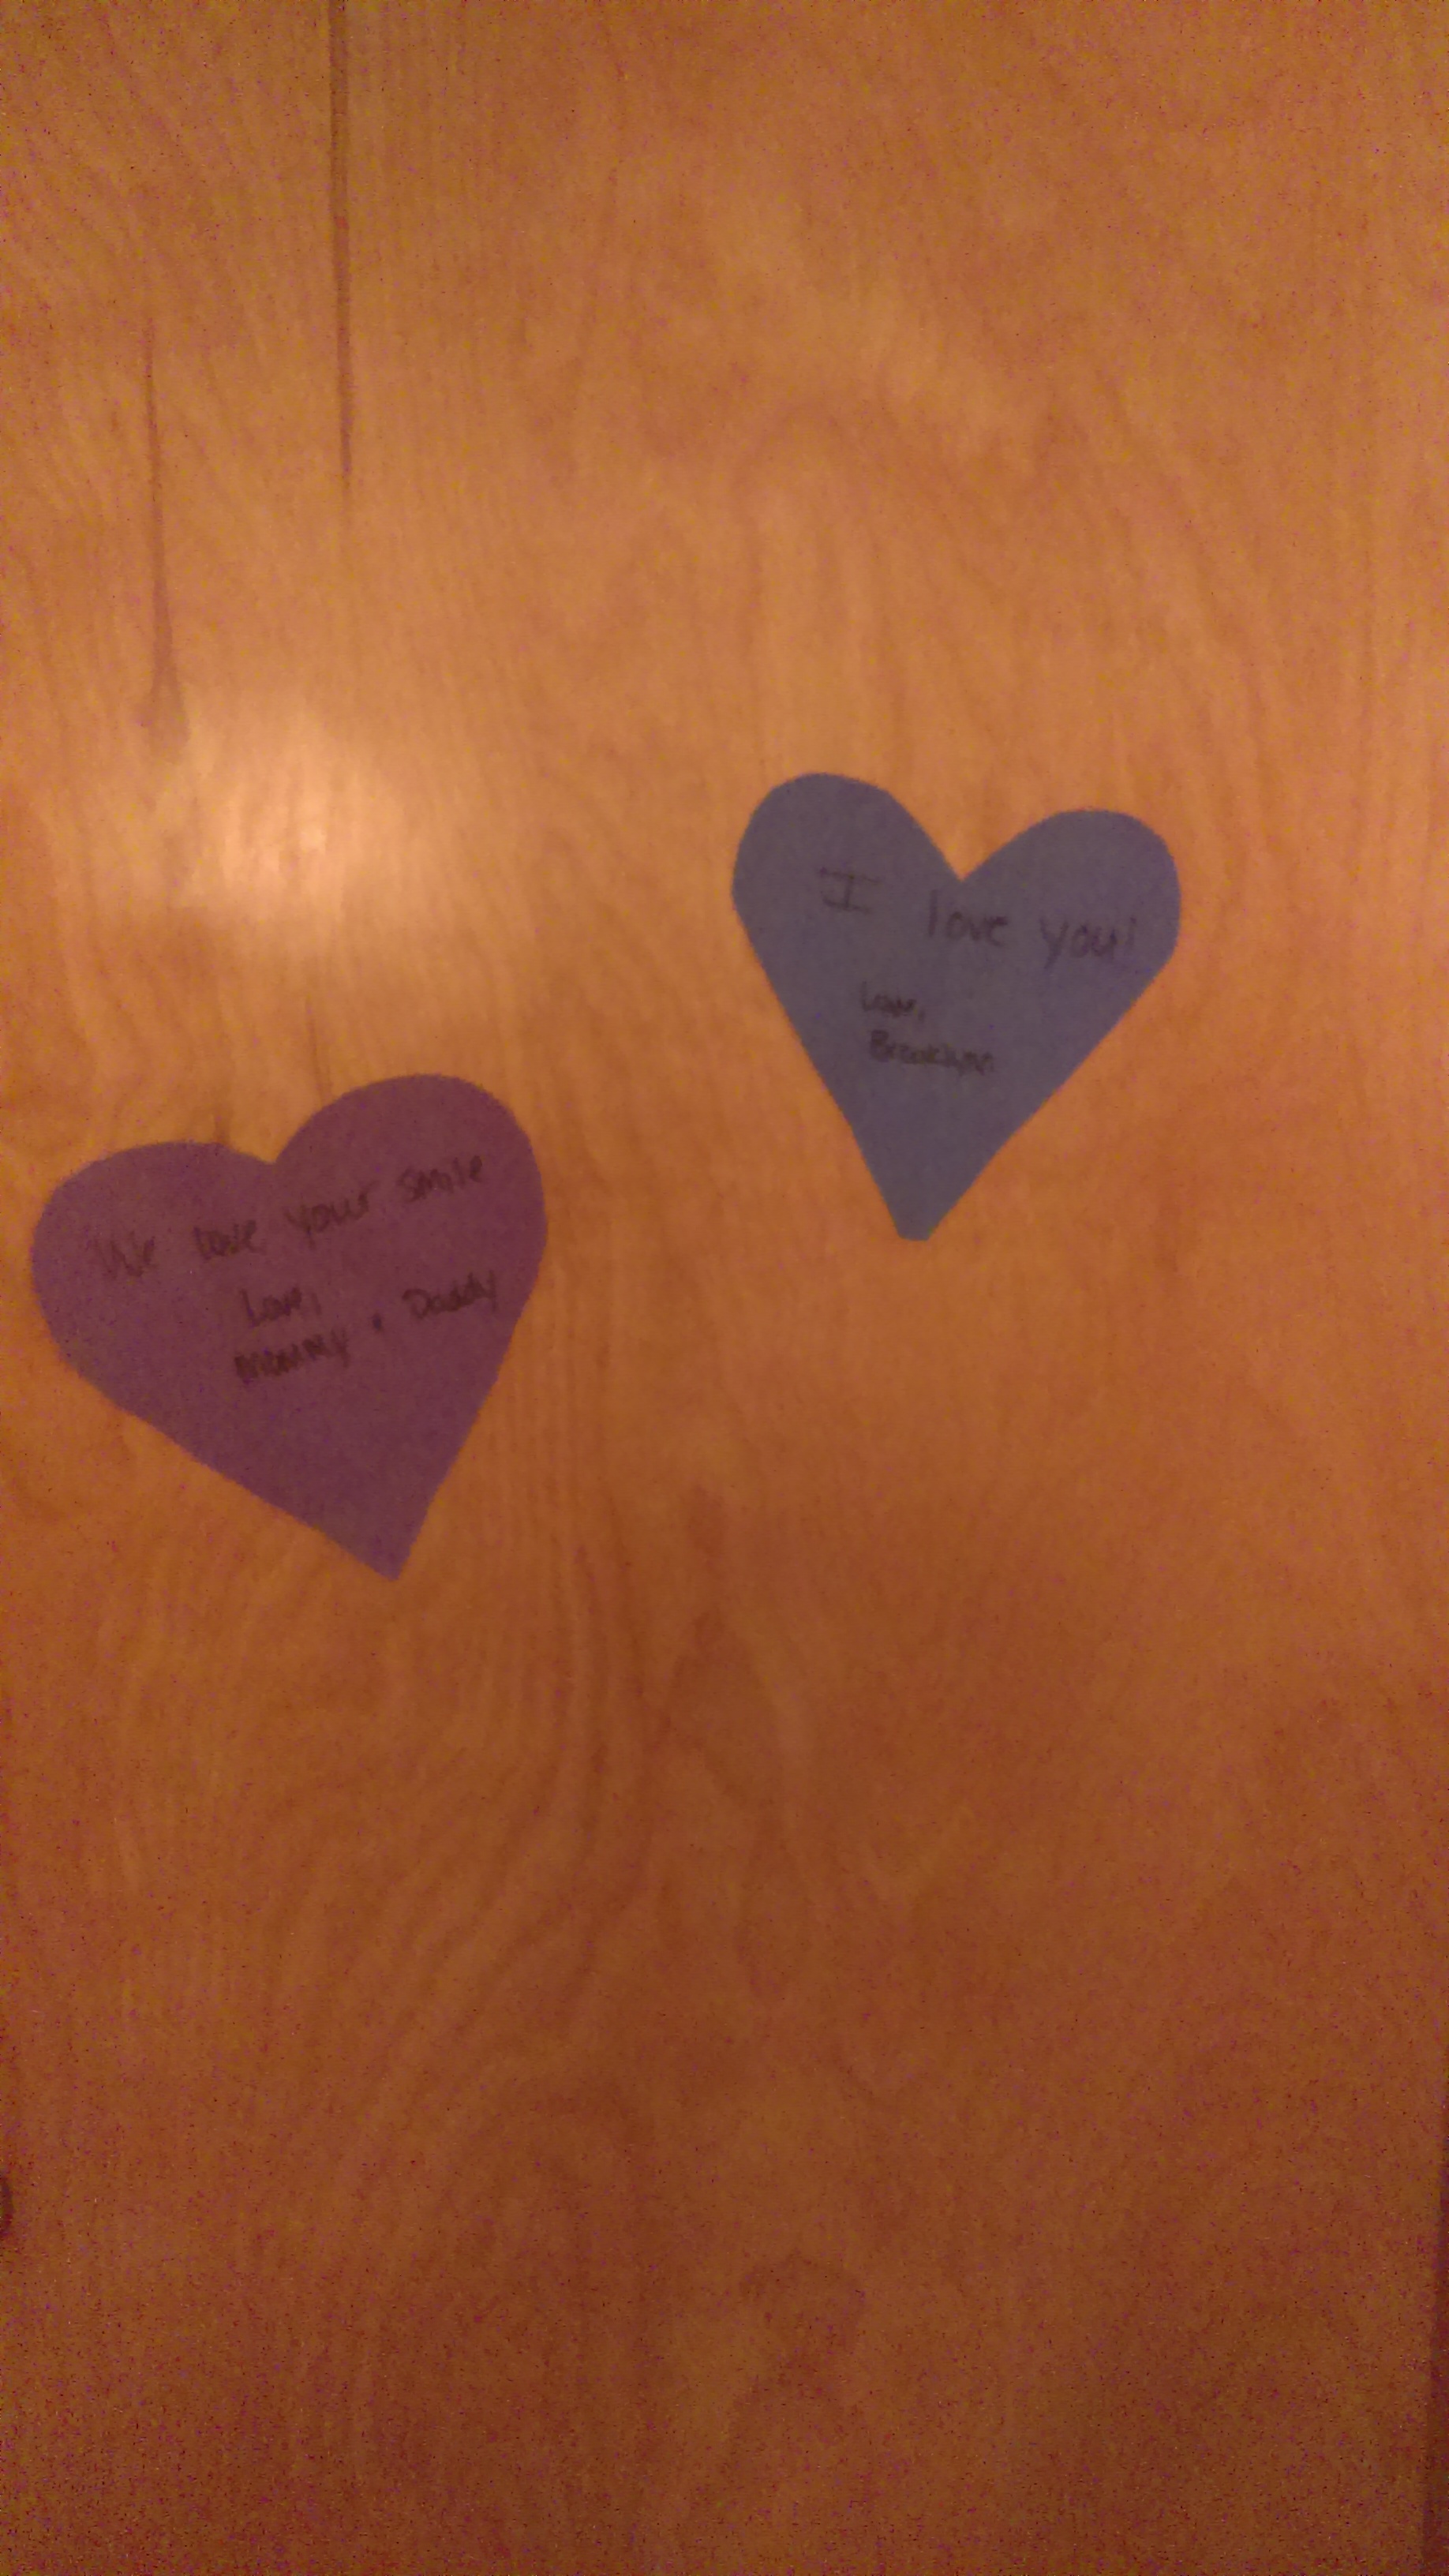
This week we are going to have her sign her hearts to we can work on writing her name some more. This idea from Skip to my Lol is an inexpensive way to celebrate Valentine’s Day with your family. Not only is it inexpensive, but it works on skills such as using scissors and writing as well as the social skill of giving meaningful compliments. 🙂
Happy Valentine’s Day from Tiny Hands Big Ideas! Don’t forget to sign up as an email follower to receive these ideas right in your inbox!!!

Sticks and Noodles
Working on our fine motor skills and patterns!

Put a little play-doh ball the counter and stick a wooden stick or spaghetti noodle into it. Then give your child a bowl of dry noodles. I used two different kinds so we could work on patterns also.
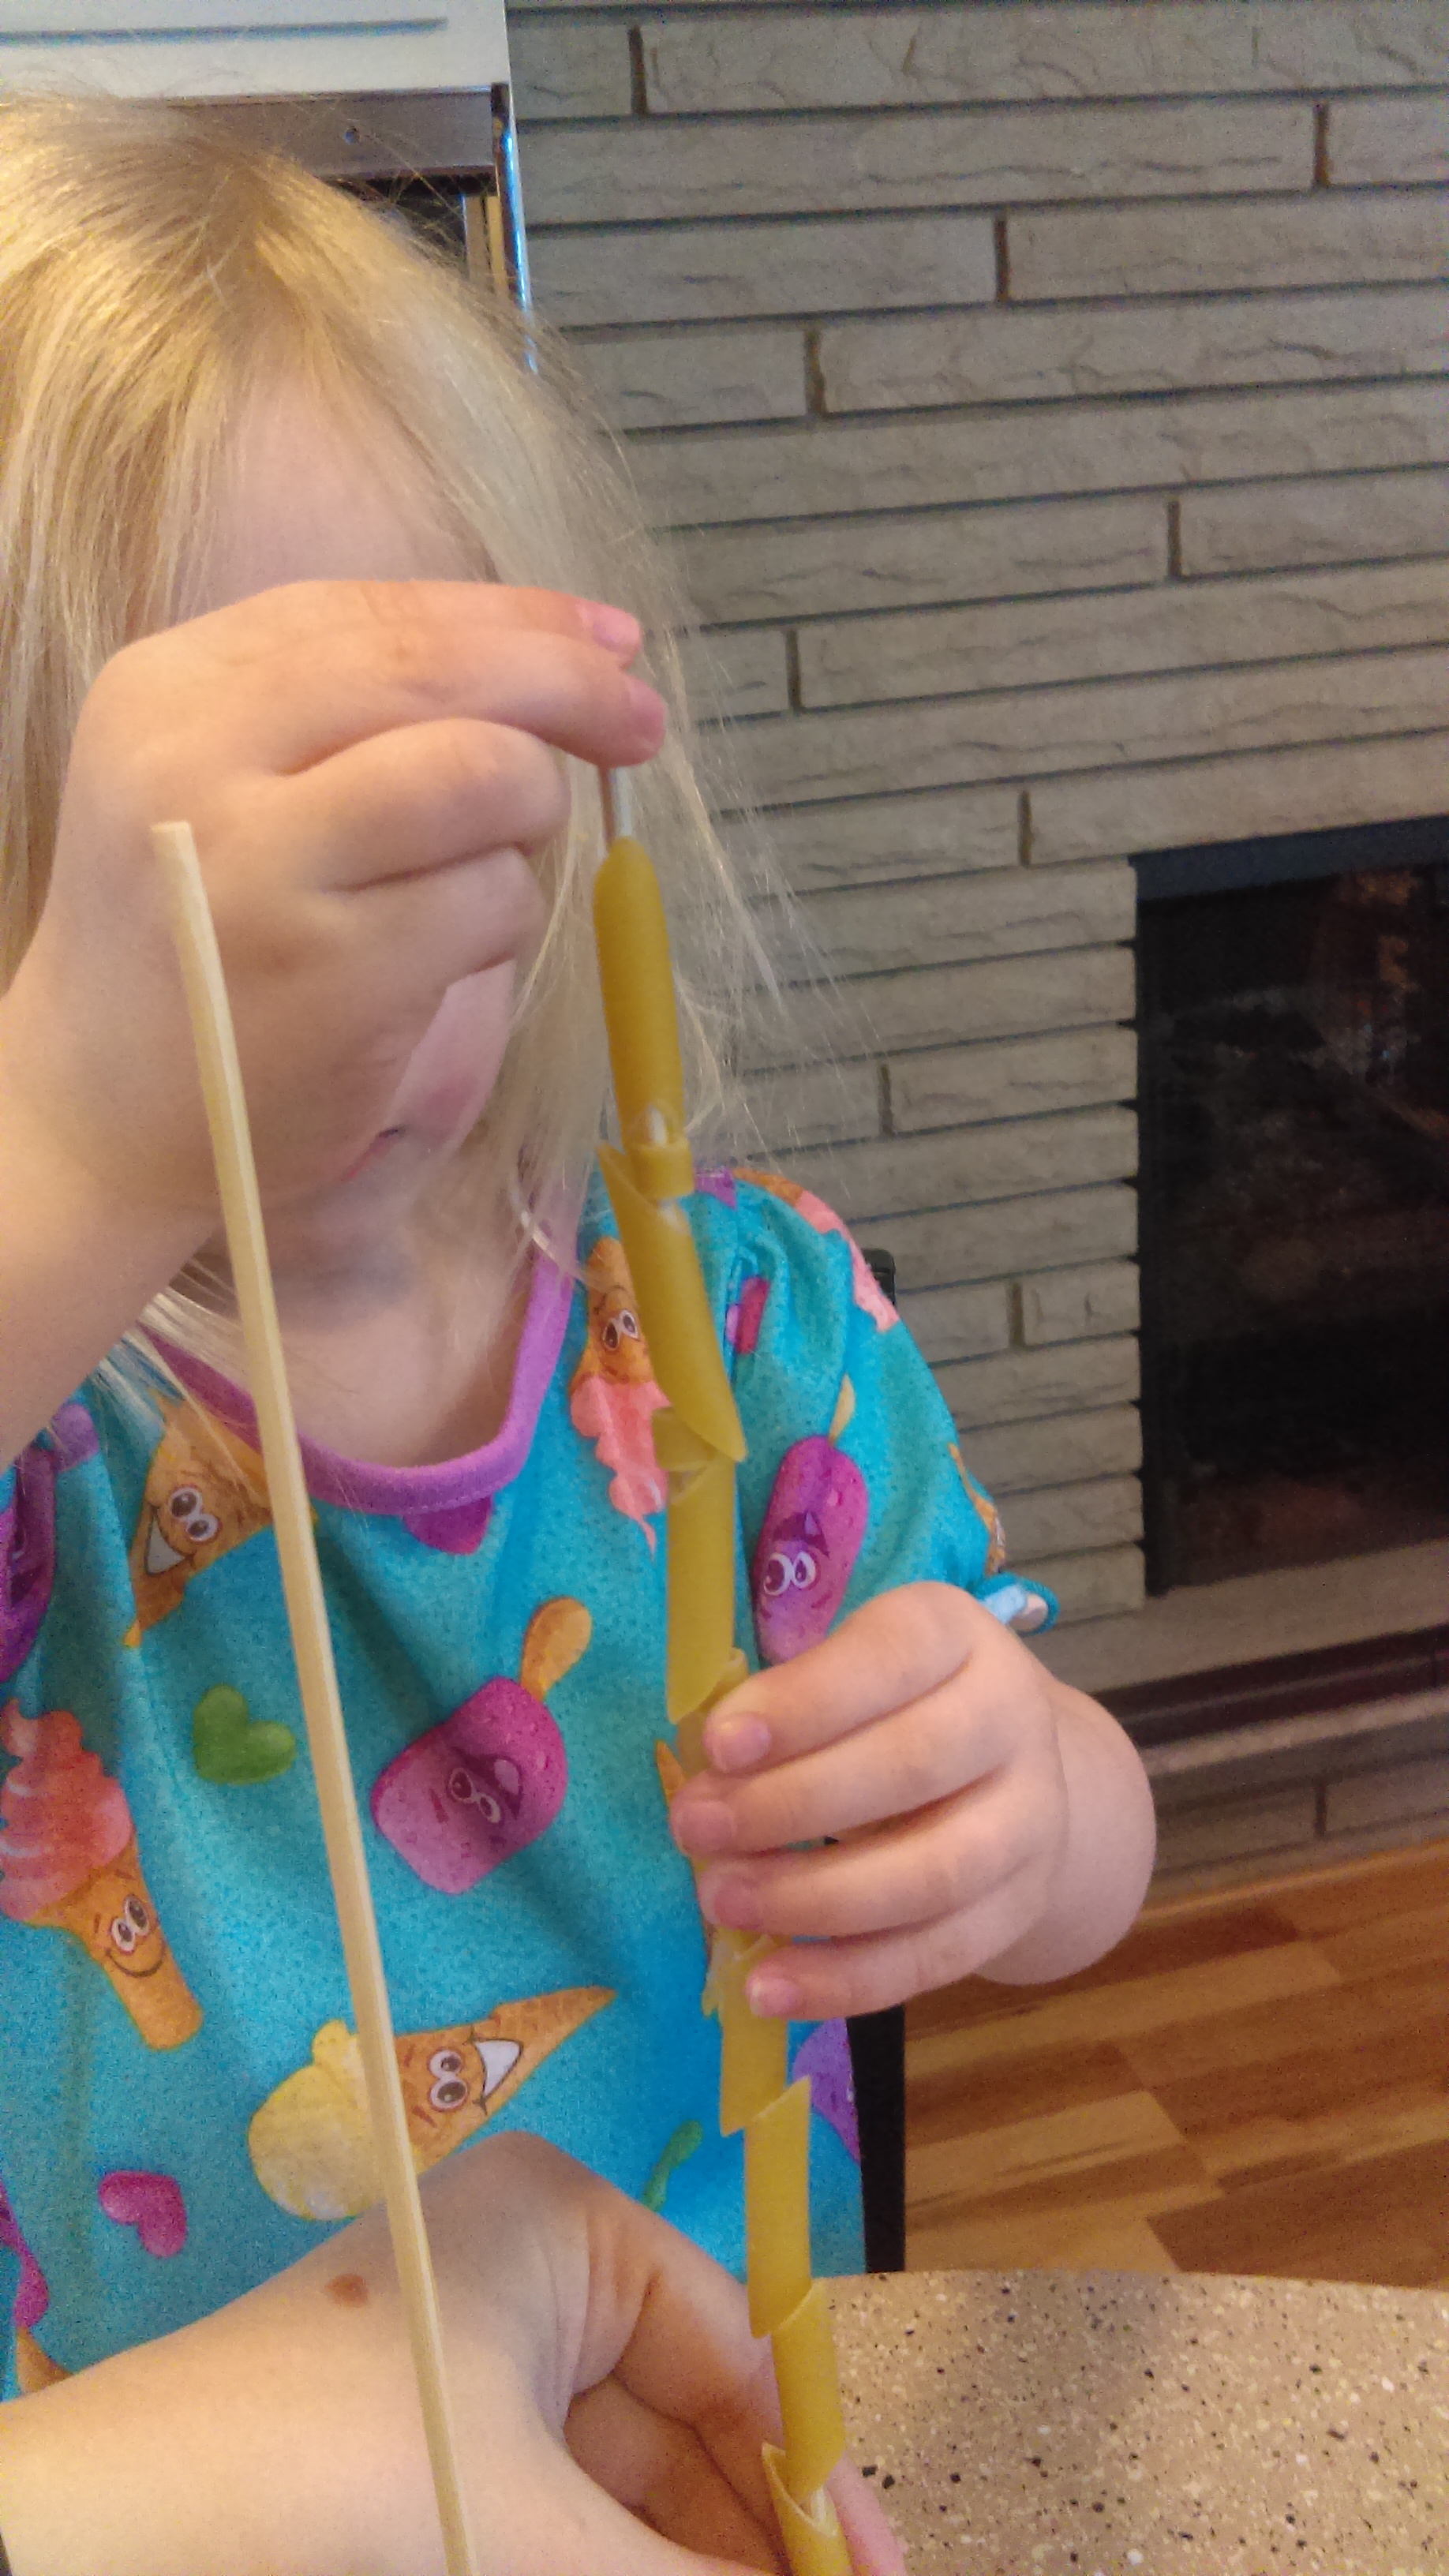
Babs loved making patterns and I loved the easy clean up!
Materials Needed:
Play-doh
Wooden stick or spaghetti noodles
Two types of noodles to thread
One eager to learn toddler 🙂
Getting back in the swing of things…
If your anything like me the holidays got you of schedule and unorganized. Although that’s not always a bad thing. It’s nice to take a break from the daily grind and just as nice to get back into it. Below are some cleaning schedules I have used in the past and some I currently use to help me stay on track. These were especially helpful when my husband and I both worked outside of the home.
#1-This cleaning schedule is one we used when my husband and I both worked outside the home. ADDED BONUS…each schedule is adapted for pet owners!
Keepin’ it clean while you both work
#2- With a different checklist for each room, this cleaning list gives you daily, weekly, and monthly jobs to keep your house looking company ready. These would be great if you have older kids. Put a copy of the list in each room and let that list be there responsibility.
Company Ready Cleaning Checklist
#3-Spring time is one of my favorite seasons, but along with it comes the dreaded spring cleaning. Ugh. This cleaning checklist goes a step further. In addition to the daily, well, monthly chores; it breaks all those spring cleaning projects down into 3-6 month and yearly sections! I currently use this one because let’s be real…I will avoid spring cleaning for an entire day at all costs.
Happy cleaning!!!

Happy Holidays
We have been busy this holiday season! Babs got a baby brother. Baby H came a little early and is happy and healthy!
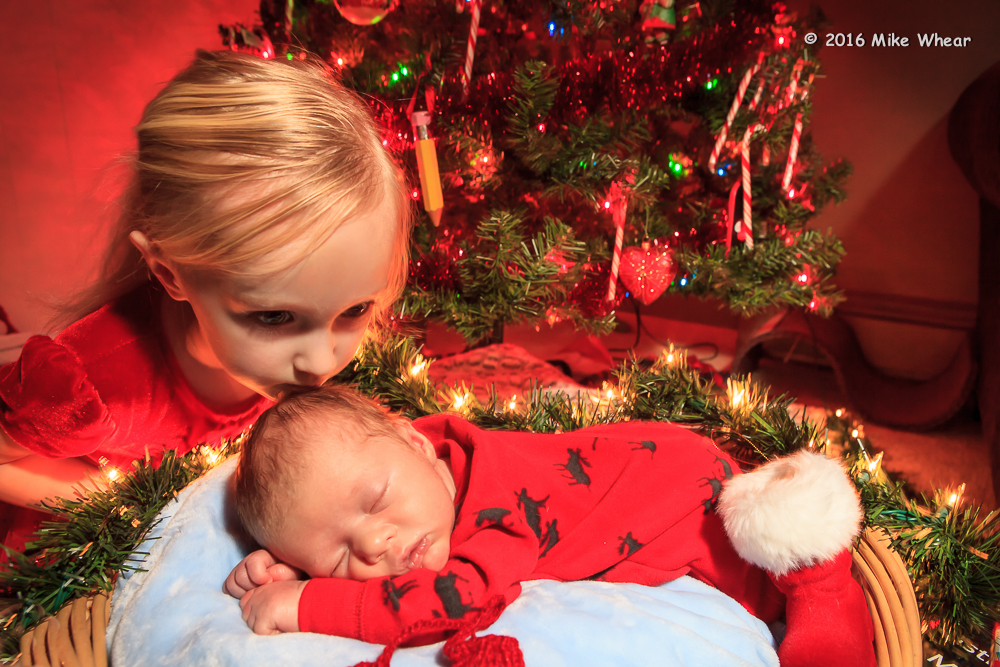
In the meantime here are a couple holiday activities we have been up to!
A new twist on the traditional advent calendar! We did a count down to Christmas with books. I wrapped 24 books individually. Starting December 1St Babs opened one book each night. I bought some new ones, but most of them were “rediscovered”. I went through Babs book shelf and took some books she hadn’t read in a while to add to our count down. She loved doing this each night and it was a great way to introduce some extra reading time with the family.

This was a small craft we did to give to family members.
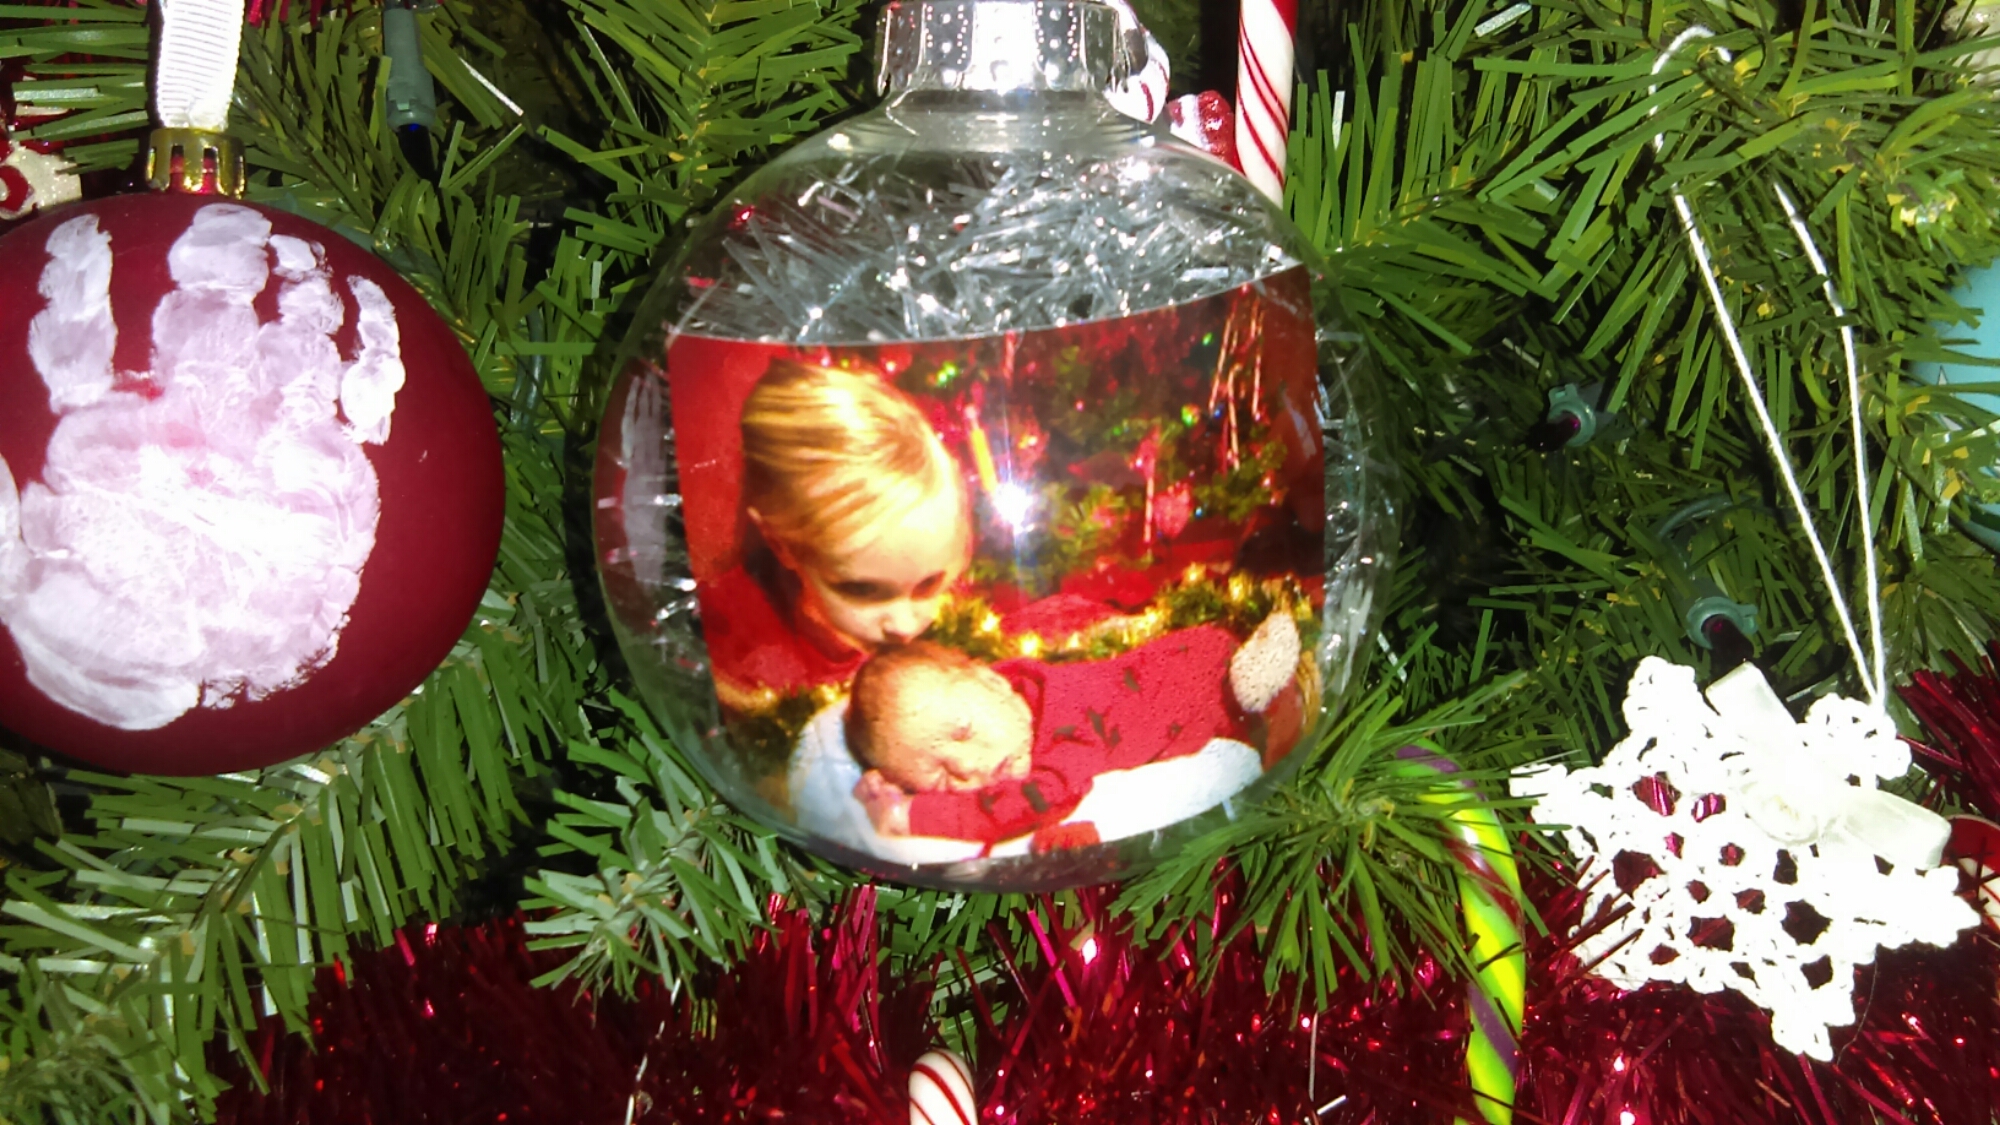
I found the bulbs at the dollar store along with the garland. I printed a wallet sized picture and rolled it to get it in the bulb. Then Babs helped me put the garland inside behind the picture. It was a great way to work on this fine motor skills!
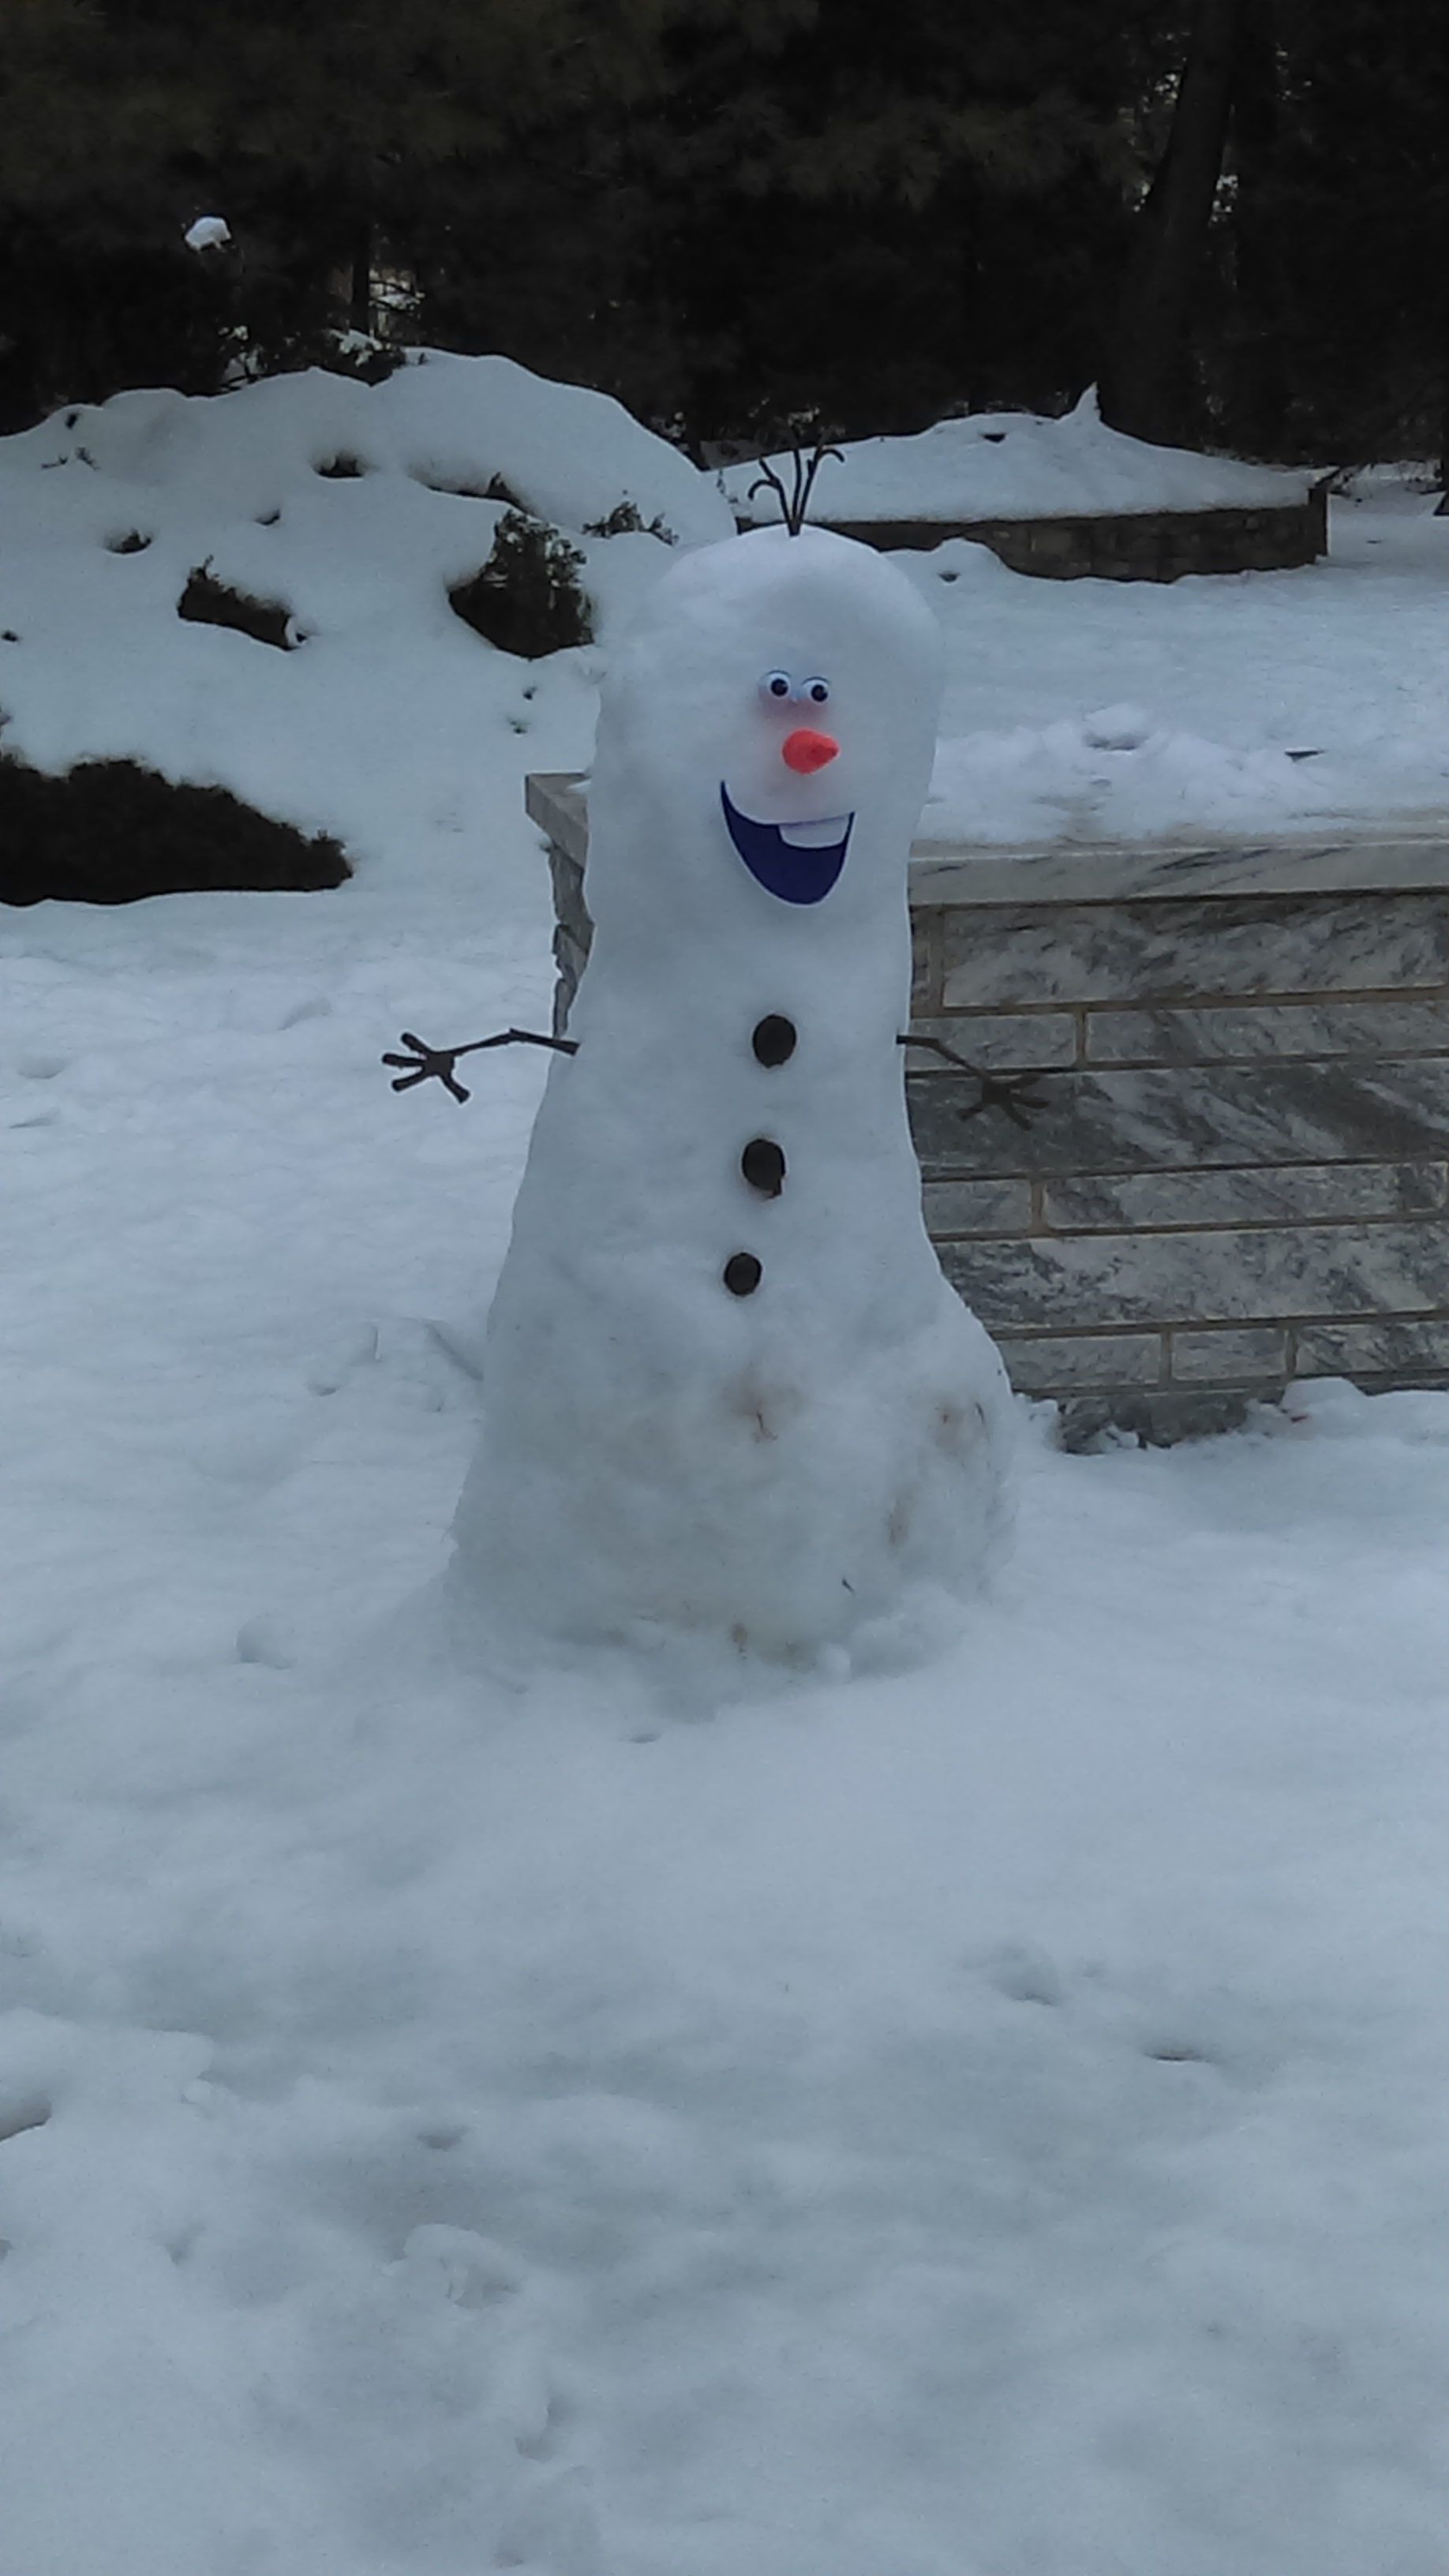
Snow angels and making Olaf!

Of course we can’t forget Elf on the Shelf! Good old Elfet came back to visit our house this year!

Happy holidays from Tiny Hands Big Ideas!

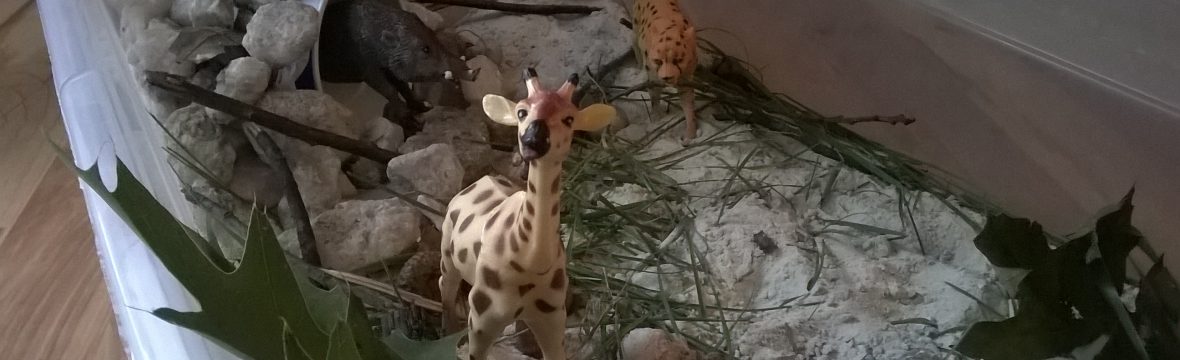
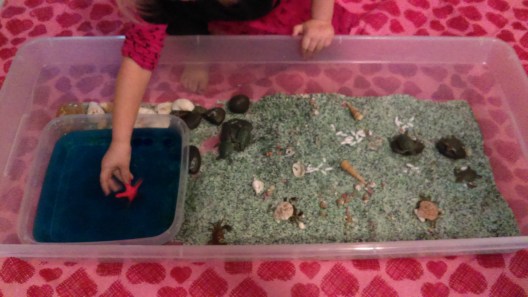
Turtle World
So we recently created another animal playscape. Babs has been really into learning about turtles. We used the Rubbermaid under the bed containers for easy clean up. I dug through the small plastic animals we bought from Target last year and found some turtles. I love the mini Terra Animals by Battat. They have a great variety and I can make TONS of animal playscape with them. We picked up some shells, and green, black, and white sand from the Dollar tree to add some color. I used a smaller container to put some water in. Add some blue food coloring and gems and you have an ocean!
What originally sparked her interest in turtles was the Zoobies book we got in the mail. 
It talks about different types of turtles and their life cycle. She was really interested in how they come to the beach to dig a nest in the sand for their eggs. I had to get creative with the eggs. I cut the tips of of some Q-tips and we used them for the eggs in the turtle world. Babs had tons of fun and was able to apply what she had learned to her play.


After playing with the turtle world for a while we also watched A Turtle’s Tale from Stepping Stones Entertainment. They make great family friendly movies for all ages.

Here are the materials you will need to make your own turtle world. Feel freebie get creative and add some of your own ideas!
Small plastic turtle figurines
Food coloring
Water in a shallow container
Sand
Q-tips
Rocks
A book about turtles from your local library (optional)
What’s for Dinner Wednesday?
I don’t know about you but our family LOVES tacos! Chicken tacos are especially good and even better when you can make them in the Crockpot! All you need are chicken breasts, black bean corn salsa (we use Meijer brand because I can usually get it on sale for a $1), and a taco seasoning packet. Dump all the ingredients in and forget about it! Hope your family enjoys it as much as we do. Recipe is below along with a way to reinvent and stretch those leftovers into chicken burritos!
Crockpot Chicken Tacos
Ingredients:
4-6 boneless skinless chicken breasts
1 jar of black bean corn salsa
1 packet of taco seasoning
Directions:
Place chicken breasts in Crockpot. Dump the jar of salsa over the chicken breasts then add the whole packet of taco seasoning. Put the lid on and cook for 6-8 hours on low or 4-5 hours on high.
Serve with shells and your favorite taco garnishes.
STRETCH THOSE LEFTOVERS! Add a can of pinto beans and white rice (amount depends on how much of the tacos you have leftover). Mix it all together with the chicken. Spoon mixture into the middle of a 10 inch round tortilla and sprinkle on some taco cheese. Fold opposite sides in until you have a square shape. Wrap each on individually in cling wrap and two layers of tinfoil and freeze. Then you can pull them out and microwave them (about 2 minutes depending on your microwave) for a quick meal. I usually top mine with some avocado. I use 5 chicken breasts in the initial recipe and I am able to get 15-20 burritos put of my leftovers!

Leaf Collage
Get outside and make use of some of those leaves laying around the yard! If you are anything like us then they are taking over your yard and you can’t keep up! We did this activity earlier in the season and are about to do it again.

Grab a basket and help your little one collect some leaves. We made a scavenger hunt out of ours. I cut up different color construction paper into squares and Babs drew one out. Then we searched for that color. Once we had enough I gave her some paper and glue and away she went!
Hope you are enjoying the Fall season!
Homemade Crock Pot Applesauce
Just put this awesome recipe in the crockpot! It’s a great family project as well!!
other
Source: Homemade Crock Pot Applesauce

Erupting Sidewalk Chalk Paint

So this is a project we did this summer, but I’m thinking of doing it again this weekend. The weather is going to be beautiful this weekend, especially for November in Michigan!
You will need some condiment bottles to do this project. I found ours for $0.89 at Walmart. The amount you needs depends on how many different colors you want to make. Also make sure you set one aside to hold just vinegar. The rest of the ingredients include water, corn starch, food coloring, and baking soda.

As you can see we made four different colors. Mix equal parts corn starch, water, and baking soda. Once mixed add some drops of food coloring. We used about 20 drops. The more you use, the more vivid your color will be. Note: This is not something you can prepare ahead of time! If it sits to long the corn starch will harden. After you have finished mixing, pour them into the bottles. Fill one bottle with vinegar and set it aside. Head outside and let your little one squirt the paint on the driveway or patio.


Babs loved making cool designs! When the paint ran out she was bummed. So I handed her the bottle of vinegar and showed her if she squirted it on her creations they would fizz and bubble up! She loved it! When your ready to wash it off your driveway use the strongest setting in your hose sprayer. A simple rain won’t wash these creations away!
Materials Needed:
Condiment bottles
Food coloring-20 drops
Corn starch-2/3 cup
Water-2/3 cup
Baking soda-2/3 cup
Vinegar- one bottle full
Hope you enjoy!
